$800
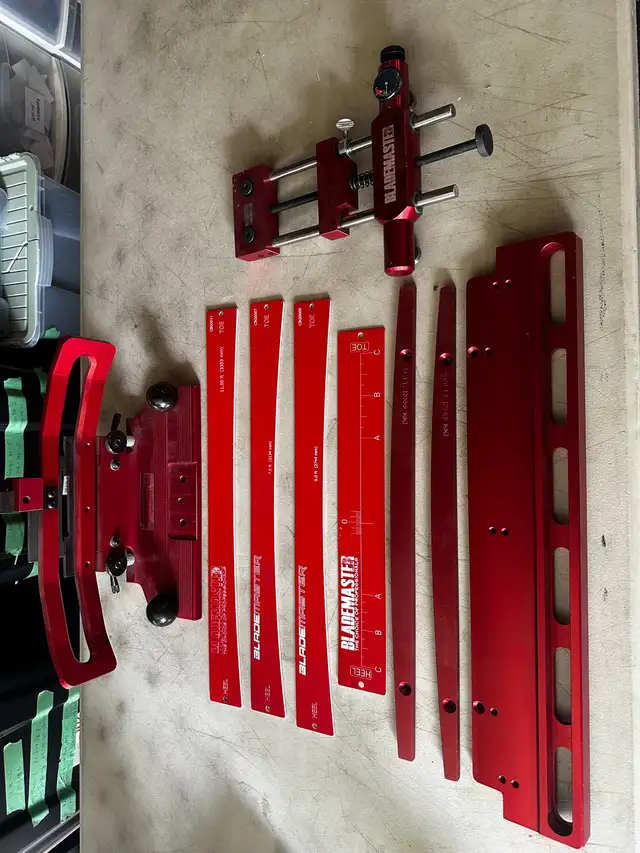
BLADEMASTER MARK 6 Contouring
Description
BLADEMASTER MARK 6 Contouring Instructions
Determination of the Body Centerline and Location in Contour Fixture
1. Place the blade over the Blade Contour Gauge (CRM6001).
2. Center the blade according to the toe and heel locations on the A to C scale. See Figure 1-A
and 1-B.
3. Using a magic marker, mark the center location on the blade (this would be the “0” location on
the gauge). Note there is a scale on either side of the 0 location if you choose to change the
lie on the profile.
4. Position the skate in the holder (toe to the right) so that the centerline mark on the skate lines
up with the left-hand side of the skate holder post and the blade holder on the skate is
pushed up snuggly against the skate holder anvil. (Use a quick clamp QC-100 when
contouring blades)
5. The skate is now ready to be contoured.
Note: you can also contour a pair of blades together. We recommend loading the pair into a quick
clamp (QC-100) before mounting in the skate holder.
Contouring The Skate
1. Affix the contour attachment to the table using the proper bolts for your model of machine
that are provided. See figure 2.
2. Affix the desired radius bar to the contour attachment. Bars can be changed by removing the
two locking screws found on top of the front of the contour attachment and lifting out the
existing bar. See figure 2. Also note as example, that the 10ft radius on the left-hand side of
the contour bar will transfer to the right side of the blade in holder & the 9ft radius on the right
hand side of the contour bar will transfer to the left side of the skate blade in holder.
Therefore, you will need to place skate accordingly. (Heel to the left, Toe to right) See figure 3.
3. Select the desired lie (F = forward (Counterclockwise), D = defense (Clockwise)). Please note
that the lie knob is setup for the skate to be positioned heel to the left. If you choose to have
the skate positioned heel to the right, then your desired lie will be opposite.
Toll Free Phone: 1-888-648-7776
Page | 2 Toll Free Fax: 1-888-667-8742
4. Dry fit the blade to the wheel. Without the wheel running, adjust feed screw so that blade is
barely touching cross grind wheel. Then back off a 1/4 turn
5. Slide holder to the left and turn on cross grind wheel.
6. Begin grinding, making four to six passes before advancing feed screw. It is important to
make enough passes to take off all the blade stock before feeding more blade into the wheel.
7. Turn feed screw ¼ turn and make several passes.
8. Continue grinding until radius falls between the two outer edges of the bottom anvil on the
skateholder. Slide depth gauge up against adjusting block and tighten turn feed screw
counterclockwise until adjusting screw is about 1/8 inch from depth gauge.
9. Remove contour attachment and blend toe and heel into center radius.
10. Remove skate from fixture and duplicate your second skate to make a matched pair.
When you call, please mention you found this ad on OKZ.ca
$800
BLADEMASTER MARK 6 Contouring

Jeff Small
Email Verified
Feb 2018
Member Since
226137
Listings
~2 hrs
Response
Safety Tips
- Meet in a public place
- Never send money in advance
- Inspect item before paying
- Trust your instincts
Similar Listings


×
![]()